JOIN A PARTNER ORGANIZATION
Attract more leads and elevate your business with our tailored solutions.
SERVICES
KIML WALLET
KIML Wallet is a non-custodial crypto wallet available on both Google Play and the Apple App Store.
DOWNLOAD THE APP TODAY!
Latest version 0.0.38
Last updated : 04 Jun 2026
How to install android app ?


AFFILIATE PROGRAMS
Our affiliate program targets high-volume traders who make at least 10 trades per day.

SEE KIML WALLET IN ACTION
 Add Custom RPC
 Add Address Book
 Restore Wallet
 Backup Wallet
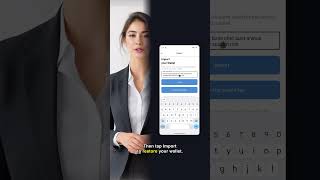 Send Money
WEB ACCESS (ADVANCED USE ONLY)
This option is not recommended for most users. It is intended for offline environments and should only be used by experienced crypto professionals who understand the associated risks.
Read Web RisksFAQ
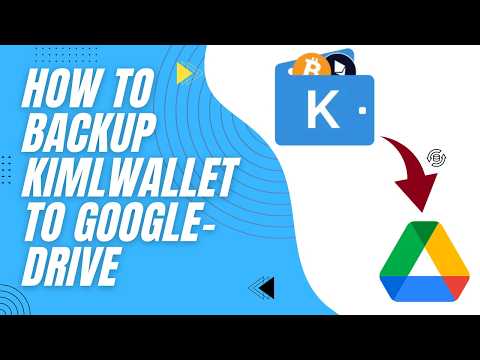
Today we're learning how to back up your Kiml Wallet to Google Drive — so your crypto is always safe and recoverable.
Step 1 — Navigating to Backup
This is the KimlWallet home screen, where you can see all your wallets. To reach the backup feature, tap the hamburger menu icon in the top-left corner. This opens the side navigation drawer. From the drawer, select Settings. The Settings page shows all your account options. Scroll down past the Account and Security sections to find the Wallet Settings section at the bottom. Tap Backup Wallets to continue. The Backup Wallets screen now shows your wallets ready to be backed up — Main Wallet is already selected. Tap the blue Backup Selected button to begin.
Step 2 — Backup Warning
A Backup Warning dialog appears — read it carefully. It says: This is not a foolproof backup. You are responsible for keeping your recovery phrase safe. Google Drive backup is for convenience only. Tap I Understand to continue.
Step 3 — Important Permission Notice
Next, an Important Step dialog appears — pay close attention. It gives you a preview of the Google permission screen coming up. Notice the checkbox that reads: See, create, and delete its own configuration data in your Google Drive. You will need to check this box in the next step — without it, the backup will fail. Tap I Understand, Continue to proceed.
Step 4 — Choose Google Account
The Choose an Account screen opens, showing all the Google accounts linked to your device. Simply tap the Gmail account you'd like to use for storing your backup.
Step 5 — Grant Google Permission (Critical)
This is the most important step! You'll see the KimlWallet permission screen from Google. Look for the checkbox next to: See, create and delete its own configuration data in your Google Drive. Make sure this checkbox is checked — this is what allows KimlWallet to store your encrypted backup securely. Without it, the backup will not work. Check the box, then tap Continue.
Step 6 — Backup Successful
And you're done! A green Backup Successful notification confirms: Your wallets have been safely backed up to Google Drive. You'll also notice a profile icon has appeared in the top-right corner — use that to manage or delete your backup whenever needed.
Step 7 — Managing Your Backup
To manage your backup, tap the profile icon in the top-right corner of the Backup Wallets screen. A panel slides down showing your connected Google account, along with two options: Delete Backup and Logout.
Step 8 — Deleting a Backup
If you tap Delete Backup, a confirmation dialog appears. This will permanently remove all wallet backup files from Google Drive — but your local wallets on this device are completely unaffected. To confirm, type the word "confirm" in the input field, then tap Yes.
Step 9 — Backup Deleted Confirmation
After confirming, you'll see the Backup Deleted notification — all wallet backup files have been permanently removed from Google Drive. Your local wallets on this device remain completely unaffected.
Step 10 — Logout / Switch Account
Alternatively, if you chose Logout from the profile panel, you'll see the Logged out successfully confirmation. The Backup Selected button returns, ready whenever you want to back up to a different Google account. And that's everything you need to know about backing up KimlWallet to Google Drive. Thanks for watching!
In this tutorial, you will learn how to manage the security settings in KimlWallet — including Auto Lock, Fingerprint Login, and changing your password.
Step 1 — Navigation: Home → Settings
This is the KimlWallet home screen showing all your crypto assets. Tap the hamburger menu icon in the top-left corner to open the navigation drawer. Tap Settings from the drawer.
Step 2 — Settings: Security Section
As soon as you tap Settings, you will see the security options — Change Password, Auto Lock, Show seed phrase, and Login with Fingerprint. Let's start with Auto Lock — tap it to configure when your wallet locks automatically.
Step 3 — Auto Lock Options
The Auto Lock screen gives you five options: Immediate, 1 minute, 5 minutes, 1 hour, or 5 hours. We strongly recommend keeping this as short as possible — ideally Immediate or 1 minute. That way, if your phone is ever stolen or left unattended, no one can access your wallet.
Step 4 — Settings: Enable Fingerprint
Back on Settings, let's enable Login with Fingerprint. This lets you unlock KimlWallet using your device's biometric sensor instead of typing your password every time. Tap the toggle on the right.
Step 5 — Fingerprint: Password Verification
A password confirmation dialog appears — this is a security check to verify it is really you enabling the feature. Tap the field and enter your wallet password.
Step 6 — Fingerprint: Tap Verify
With your password entered, tap Verify to confirm.
Step 7 — Fingerprint Enabled: Change Password
Fingerprint login has been enabled successfully. You can now unlock KimlWallet with just your fingerprint. Next, let's walk through how to change your wallet password — tap Change Password.
Step 8 — Change Password: Empty Form
The Change Password screen has three fields: your current password, your new password, and a confirmation of the new password.
Step 9 — Change Password: Filled, Tap Update
Fill in all three fields, then tap Update Password.
Step 10 — Password Updated Successfully
Your password has been updated successfully — a confirmation toast appears at the bottom. Your wallet is now protected with your new password.
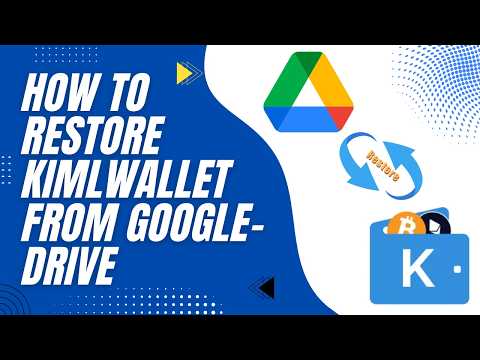
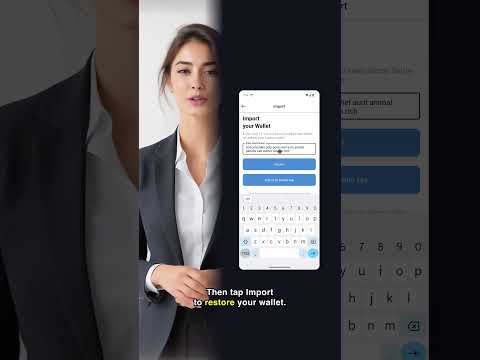
In this tutorial, you'll learn how to restore your wallets from Google Drive in KimlWallet. This is useful when you've switched to a new device, reinstalled the app, or simply need to recover your wallets from a previous backup.
Step 1 — Navigation: Home → Restore Wallets
This is the KimlWallet home screen showing all your crypto assets. Tap the hamburger menu icon in the top-left corner to open the navigation drawer. Tap Settings from the drawer. Give it a moment for the Settings page to load. Now scroll down past Account Settings, Security, and the General section. Keep scrolling until you reach the Wallet Settings section near the bottom. Tap Restore Wallets.
Step 2 — Restore Wallets: Connect Google Drive
You'll arrive at the Restore Wallets page. Tap the blue Connect Google Drive button to link your Google account and access your backed-up wallets.
Step 3 — Important Step: Checkbox Warning
An Important Step dialog appears — pay close attention. When signing in with Google, you must CHECK the checkbox to allow the app to access its own folder in Google Drive. This is crucial for restoring your wallets. Tap I Understand, Continue to proceed.
Step 4 — Choose Google Account
The Choose an Account screen opens, showing all the Google accounts on your device. Tap the account that you previously used to back up your wallets.
Step 5 — Sign in to KimlWallet: Confirm
Google will show you the sign-in confirmation for KimlWallet, including the profile name and email address linked to that account. Review the details and tap Continue.
Step 6 — Google Drive Access: Check the Checkbox
This is the most critical step! You'll see the permission screen from Google. Look for the checkbox next to: See, create and delete its own configuration data in your Google Drive. This checkbox MUST be checked — it allows KimlWallet to access your encrypted wallet backup. Without it, the restore will fail. Check the box, then tap Continue.
Step 7 — Select Wallets to Restore
You'll now see a list of all wallets backed up to that Google account. Main Wallet is already selected. You can select or deselect any wallet you want to restore. When you're ready, tap the blue Restore Selected button at the bottom.
Step 8 — Restore Complete
Your wallet has been successfully restored! You'll see the green Restore Complete notification at the bottom confirming: Restored 1 wallet. You'll also notice a profile icon has appeared in the top-right corner of the Restore Wallets page.
Step 9 — Profile Panel: Logout to Switch Account
To manage your connection, tap the profile icon in the top-right corner. A panel slides down showing your connected Google account, with two options: Delete Backup and Logout. If you accidentally chose the wrong account, simply tap Logout — this signs you out within KimlWallet without deleting any backup data.
Step 10 — Logged Out Successfully
You'll see the Logged out successfully confirmation and return to the Connect Google Drive page. Simply tap it again and follow the same steps from the beginning to connect the correct account. And that's everything you need to know about restoring your KimlWallet from Google Drive — thanks for watching!
Every time your wallet fetches a balance or sends a transaction, it's talking to an RPC endpoint — your gateway to the blockchain. By default, wallets use third-party endpoints, and that comes with some real trade-offs. Third-party endpoints may log your details with every request. They get congested during peak traffic. And you have no control over who's handling your data. That's where a custom RPC URL changes everything. With your own node or a trusted provider, you get better privacy, faster response times, and full control over who sees your requests. With Kimlwallet's Custom RPC feature, making that switch takes just a few seconds.
Step 1 — Navigation: Home → Custom RPC
This is the home screen showing all your crypto assets. Tap the hamburger menu icon in the top-left corner to open the navigation drawer. Tap Settings from the drawer. Give it a moment for the Settings page to load. Now scroll down past Account Settings, Security, and the General section. Keep scrolling until you reach the Wallet Settings section near the bottom. Tap Custom RPC.
Step 2 — Custom RPC: Empty State
This is the Custom RPC page. Right now it's empty — no custom endpoints have been added yet. Custom RPC lets you override the default blockchain endpoint for any network, per wallet. This is useful if you want faster speeds, better uptime, or more privacy. Tap Add Custom RPC to get started.
Step 3 — Add Custom RPC: Empty Form
The Add Custom RPC form has three fields. First, select the network — for example Itheereum, Bitcoin, or any supported chain. Then enter the Custom RPC URL of the endpoint you want to use. Finally, choose which wallets will use this endpoint. Let's start by selecting the network.
Step 4 — Add Custom RPC: Ethereum Selected
I've selected Itheereum as the network. Now enter the URL of your custom RPC endpoint. This could be a self-hosted node, or a URL from a privacy-focused provider. Good options include Alchemy, Infura, dRPC, or a self-hosted node. Make sure the URL starts with https — never use an unencrypted http endpoint for a live wallet.
Step 5 — Add Custom RPC: URL Typed
I've entered the custom RPC URL. Now tap All Wallets to choose which of your wallets will use this endpoint.
Step 6 — Select Wallets Drawer
This drawer lets you choose which wallets will route through this custom RPC. Both Main Wallet and Backup Main Wallet are selected by default. You can uncheck any wallet you want to keep on the default public endpoint. Slide the drawer down to close it, then tap Save.
Step 7 — Custom RPC: Ethereum Saved
Your custom Itheereum RPC is now saved. You can see the network name, the URL, and which wallets are using it. From now on, all Itheereum transactions for those wallets will go through your chosen endpoint instead of the default public one. To manage this entry, tap the three-dot menu.
Step 8 — Edit / Delete Popup
Two options appear — tap Edit to update your RPC settings.
Step 9 — Edit Custom RPC Page
The Edit Custom RPC page is pre-filled with your current settings. Update whichever fields you need — the network, the URL, or the wallets. When you're done, tap Save.
Step 10 — Custom RPC List: Outro
Your updated Custom RPC is saved and active. If you ever need to remove an endpoint, just tap the three-dot menu on the card and choose Delete — your wallet automatically falls back to the default public endpoint. That's all there is to Custom RPC in Kimlwallet. Thanks for watching!
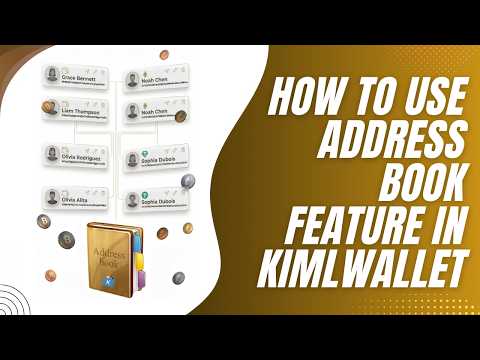
Sending crypto to the wrong address is irreversible. In this video I'll show you how to use Kimlwallet's address book feature so you can save trusted addresses and send safely every time — no more risky copy-pasting.
Step 1 — Navigation: Home → Address Book
This is the home screen showing all your crypto assets. Tap the hamburger menu icon in the top-left corner to open the navigation drawer. Tap Settings from the drawer. Give it a moment for the Settings page to load. Now scroll down past Account Settings, Security, and the General section. Keep scrolling until you reach the Wallet Settings section near the bottom. Tap Address Book.
Step 2 — Address Book: Empty State
This is the Address Book — your personal contact list for crypto addresses. Right now it's empty. Every time you copy-paste an address manually, one wrong character means your funds are gone forever. The Address Book lets you save trusted addresses once, verify them once, and reuse them safely every time. Tap Add Address to get started.
Step 3 — Add Address: Empty Form
This is the Add Address form. Let's start by selecting the network.
Step 4 — Add Address: Ethereum Selected
I've selected Ethereum as the network. Notice the blue tick confirming this address works across all EVM-compatible chains — that includes Polygon, BNB Chain, and more. Now enter the wallet address. You can type it directly, copy-paste it, or tap the QR code button to scan the address from a phone — ideal for receiving addresses from friends in person.
Step 5 — Add Address: Address and Name Entered
I've entered the address and named this contact John. Use naming conventions that tell you exactly who and what it is — for example, John Coinbase ETH, or Dad BTC. The Optional Label adds more context if needed. Now let's look at the All Wallets option — tap it.
Step 6 — Select Wallets Drawer
This drawer lets you choose which of your wallets can use this saved address. By default, the address is available to all wallets — Main Wallet and Backup Main Wallet are both checked. You can uncheck any wallets you don't want associated with this contact. Slide the drawer down to close it, then tap Save.
Step 7 — Address Book: Contact Saved
Your new contact appears in the Address Book. You can see John with the EVM network tag and the wallet address. The copy icon lets you quickly copy the address to clipboard. To manage this entry, tap the three-dot menu on the right.
Step 8 — Edit / Delete Popup
Two options appear — tap Edit to update the address details.
Step 9 — Edit Address Page
The Edit Address page looks just like the Add Address form, pre-filled with the current details. You can update the network, correct the address, rename the contact, or add a label. Make your changes and tap Save. Your address book is updated instantly.
Step 10 — Updated Contact
And here's our updated contact. If you ever need to remove an address, just tap the three-dot menu and choose Delete — it's gone instantly. Now let's see how to use a saved address when you actually send crypto.
Step 11 — Go to Home Screen
Go back to the home screen. Let's say you want to send Ethereum to John. Tap Ethereum from your asset list.
Step 12 — Ethereum Detail Page
You're on the Ethereum detail page. Tap Send.
Step 13 — Send Funds Page
The Send Funds page opens. Instead of manually typing or pasting an address, look to the right of the Send To field — next to the QR code button, there's an address book icon. Tap it to open your saved contacts.
Step 14 — Address Book Opens
Your Address Book opens showing all saved contacts. Before tapping an entry, take a moment to verify the first and last six digits of the address match what you expect. Then tap John's entry — the address auto-fills in the Send To field instantly.
Step 15 — Address Auto-Filled
John's address is now filled in automatically — no copy-pasting, less risk of errors. For first-time transfers, consider making a small test transaction before sending the full amount. That's the power of the Address Book — save once, send safely every time. Thanks for watching!
Kiml Wallet is a non-custodial, open-source, and secure wallet. Our code is fully transparent and available for review:
- To purchase cryptocurrencies using a credit card, click the "Buy Crypto" in the main menu or drawer. Select Credit Card, choose your desired asset, enter the amount in EUR or USD, and then click the "Check Best Price" button.
- We offer multiple providers—feel free to proceed with the one you prefer or the one offering the best rate.
- You will be redirected to our external partner to complete the transaction. Please note that, since the purchase is handled by a third party, additional fees may apply and a separate KYC (Know Your Customer) verification will be required.
- Once the order is complete, you will be able to view it on the Home screen.
- Note: in case you already own some cryptocurrencies, it’s possible to perform the deposit in a simple and efficient way with no verification required.
- To deposit cryptocurrencies, navigate to your wallet, select the asset you wish to deposit, and tap the “Receive” button.
- A QR code representing your wallet’s receiving address will be displayed on the next screen. Below it, you’ll find “Copy” buttons to make the deposit process more convenient.
- Once the transfer is complete, the deposited funds will appear in the asset section of the main menu.
- Important: Only send the supported cryptocurrency to the corresponding wallet address. For example, do not send BCH (Bitcoin Cash) to a BTC (Bitcoin) address. Incorrect deposits may result in permanent loss of funds.
- Here you can find all the steps to download the Kiml Wallet app and create your wallet.
- Download and install the application from App Store or Google Play Store.
-
Start creating a new wallet by choosing a password:
- Choose a strong password and store it safely, offline, in a secure place.
- The password will be used to access the wallet, confirm transactions, and authorize important actions within the app.
- Remember: Kiml Wallet cannot recover your password.
- Write down the 12-word recovery phrase displayed and store it securely.
- Never share your 12-word recovery phrase with anyone, including individuals claiming to be part of the Kiml Wallet team.
- Do not store your 12-word phrase digitally—physically write it down.
- For security reasons, taking a screenshot of the phrase is disabled. - Choose whether you’d like to share anonymous usage data to help improve the app and user experience.
- Your Kiml Wallet is now ready to use.
- Currently, it is not possible to make direct FIAT currency deposits into your Kiml Wallet.
- Within the "Buy Crypto" section, however, it is now feasible to buy USDT or USDC (stable coins pegged to dollars).
- This feature enables the acquisition of tokens that serve as representations of FIAT currency, preserving a 1-to-1 parity and effectively simulating a real FIAT asset.
Once a transaction in Kiml Wallet has reached the status of “Confirmed”, it is final and irreversible. Due to the decentralized and immutable nature of blockchain networks, confirmed transactions cannot be canceled, modified, or reverted under any circumstances. This applies across all supported chains and is not unique to Kiml Wallet.
2. Pending Transactions – Can Be Sped Up or Canceled (EVM Only)If your transaction is still in a “Pending” state—often due to low gas fees or network congestion— Kiml Wallet offers an option to either speed up or cancel the transaction. This feature is available only on EVM-compatible chains (such as Ethereum, BNB Chain, and Polygon).
✅ How to Speed Up or Cancel a Pending Transaction:- Navigate to the asset from which the transaction was initiated.
- Tap on the “Transactions” button to view recent activity.
-
If a transaction is still pending, you will see two actionable options:
- Speed Up: This will re-submit the transaction using the same nonce but with a higher gas fee, increasing the chance of quicker confirmation.
- Cancel: This creates a zero-value transaction to your own address, also using the same nonce and a higher gas price, which may override the pending transaction and effectively cancel it.
⚠️ Important Note: These actions are only available while the transaction remains pending. Once it gets mined and confirmed on the blockchain, these options will no longer appear.
- In order to recover your Kiml Wallet (in case you have changed or lost your device), you need to be in possession of the backup phrase (12 words).
- Reinstall the application. At a certain point, during the configuration process, you will be asked to Create a new wallet or Import an existing one.
- Choose the Import option, then insert the 12 words. Your wallet and assets will be available again.
Most modern Bitcoin wallets, like Kiml Wallet, use Hierarchical Deterministic (HD) technology. This means they automatically generate a new receiving address for each incoming transaction. Here’s why that matters:
🔐 Why Addresses Change- Improved Privacy: Using a new address for each transaction makes it much harder for others to track your full transaction history on the public blockchain.
- Transaction Clarity: It’s easier to distinguish who sent what and when, especially when managing multiple payments.
- Best Security Practices: Reusing the same address repeatedly can link all your payments to one identity, which is a privacy risk.
- All previously generated addresses remain valid and can still be used to receive funds. The wallet simply rotates to a new one for added privacy and organization.
- Let me know if you’d like to dive deeper into how HD wallets work or see how this compares to other wallet types like custodial or multi-sig wallets.
Certainly, to create an additional wallet, please follow these steps:
- Navigate to the "Wallets" option located in the menu bar.
- Click on the plus sign icon.
- Proceed to create a new wallet using the provided options.
You can install the app from this Google Play Store page for Android devices and from this App Store page, for iOS devices. Also, the Kiml Wallet's app is available for desktop here.
Once loaded on your smartphone and laptop, follow the instructions and create your wallet or import an already existing one.
Due to the immutable nature of blockchain technology, wallets cannot be deleted from the blockchain. Once a wallet address is created, it remains permanently on the network.
However, Kiml Wallet allows you to delete the local instance of a wallet stored on your device. You can either:
Delete an individual wallet, or
Delete all wallets and associated data from the app.
🔹 How to Delete an Individual WalletYou can remove a specific wallet from the app by following these steps:
- Open the menu or drawer.
- Tap on “Wallets” to view the list of all your added wallets.
- In the top-right corner of the navigation bar, tap the delete icon (🗑️).
- Confirm the deletion when prompted.
💡 Note: This action only deletes the selected wallet from your device. It does not affect the blockchain or other wallets in the app.
🔄 How to Delete All Wallets (Factory Reset)To delete all wallets and related data from Kiml Wallet:
- Open the menu and select “Delete Account”.
- You will be prompted to:
- Confirm the action.
- Type a specific confirmation phrase into the text input.
- Once confirmed, Kiml Wallet will:
- Delete all wallets stored on the device.
- Remove your local password and access credentials.
⚠️ Important: This action is irreversible and will permanently remove all wallets and associated data from your device.
GET INVOLVED
Whether you're a developer, designer, or enthusiast, there's a place for you in the KIML Wallet community.
Join Our Community